Old Dogs and New Tricks
- acolltobuild
- Sep 16, 2025
- 23 min read

An old photo of our plot from 1957. Presumably before the field drainage clogged up! (Thanks to Jonathan Tunnell for sending us this).
The last blog we published was in July 2024 and in that we promised another update “in the autumn”. It’s now the autumn, (albeit a year later!). We saw no urgency for a blog as Julia started posting regular updates on Instagram however some of you have been badgering me to fill in the gaps. so here it is...
In terms of the house, it’s been going well but we are far from finished. I know that is hard to believe after 4 years (!) but it’s only really been going for half of that time when you take into account all our travels. Also, apart from a very few tasks, Ju and I have been working alone.
Last year we decided to split the remaining work into two lots. One for the “priority tasks” needed for us to comfortably occupy the house and the rest for things that we can “do at our leisure” once we have moved in. We now have a completed bedroom and bathroom upstairs along with a TV room/snug. Apart from a carpet and a couple of cupboard doors, the upstairs is all done. The remaining priority tasks includes the utility room, the kitchen, the main living room and the part of the hallway that joins them up. The rest (2 bedrooms, 2 bathrooms and an office downstairs) can be shut off and worked on at any point.
For those of you not interested in the detail, the highlights of what we have done since the last blog are…
Tested the stove and used it to heat the house and generate hot water in the thermal store. Yay!
Built out and installed the first of our 3 bathrooms (upstairs). It is all plumbed and operational with a hot shower!
Plastered all the upstairs rooms, the hall and stairwell (well Ricky did that!)
Painted the upstairs rooms and hall (only stairwell to be completed)
Hung all the doors upstairs (except the cupboard ones)
Completed all upstairs finishing joinery (skirting boards, stair sidings, architraves etc.)
Plaster boarded and installed sound insulation the main room, kitchen, utility and hall
Plastered the main room, utility, hall and kitchen (quite a story about that!)
Painted about 80% of the downstairs (excluding the spare bedrooms and bathroom)
Installed the utility room units and worktop. We now have a working washing machine!
Installed all the kitchen units and now have 2 ovens and fridge freezer working
Cut the kitchen worktop and finished all the kitchen plumbing ready for the hob/sink
Installed lights and power everywhere and we now have our electrical completion certificate! (Thanks to Jonny, Ross and Conor for that!)
Built a walk in cupboard in our bedroom (which was another time saving Ikea hack!)
Installed an obscenely large telly in the snug (locally known as Red Rocks Cinema which was appreciated by island rugby fans for the Lions matches).
Installed lock nuts on the solar array and repainted the rusty footings
Put two reinforced concrete runners on our track to prevent wheel spins and associated pot hole damage.
Damed the pond to make it a lot bigger and added a few more brown trout!
And now for the detail …

The first thing we tackled after the last blog was the upstairs bathroom. This was not easy and required many yet-to-be learned skills. We had to plan the layout of everything and make sure the plumbing “ends” were in the right places and ensure the drains were connected to the underground soil pipes below the ground floor. This involved putting a soil pipe inside a structural wall and unfortunately, like most of the house design, the route was not properly considered in the plans. We had to install more structural joists in order to allow the cutting out of the 110mm hole to accommodate this.
Before going any further with the fitting, we decided to get the messy job of plastering the ceiling out the way. This was both a test to see if we could actually do plastering and also a necessary task in order to move on with the bathroom. We could not find any plasterers willing to come to the island so we needed to give it a try. How difficult can it be? Answer: Very! The result (apart from a near divorce) was a bit like the Caves of Nerja and we spent as much time sanding it as we did plastering!

Routing the hot and cold water supply and joining up the drains was relatively easy though.

Once the plumbing was in place we built out the walls to accommodate the hidden cistern and the shower end wall. For the latter, we invented an Ikea hack! We bought 4 of the Kallax units and stuck them together using the side of them to frame out the shower wall. This provided finished storage shelving and the wall to end the shower enclosure. We were quite chuffed with the result.

We then built the frames for both the cistern and the wall hung WC. It’s apparently good for 450kg but I’m not going to test it to that! We used marine plywood for the floor to support the tiles and the shower tray.
The shower tray has to be level and fully supported underneath by dods of mortar. It looks like a dog might have been trapped in there for a long while... probably an OCD dog too! We were mid-install when we got a surprise visit by MacKenzie and Alison. It was lovely to see them but the timing wasn’t great! They patiently waited for us to finish the job before we opened the bar.

As we planned to have floor to ceiling tiles, we decided to use cement board on the walls as it is a much better substrate for tiles than plasterboard. This stuff is HORRIBLE to work with. Very heavy, expensive and difficult to cut. And once again, due to the lack of planning with the wall joist spacing, we had to cut and waste a lot!

Then it was time for the tiles. We chose big tiles but as a result nearly all of them needed to be cut to size. It’s a bit of a jigsaw puzzle working out how not to end up with tiny slithers of tile at window openings and wall ends. We almost got it right. Just one wee area that could have been better. We bought a water cooled tile cutting machine from Screwfix (for about £50) which was a bit on the cheap side but it managed to see us through! The jury is out as to whether it will survive the next 2 bathrooms though.


Once the tiling was done It was just a case of installing the vanity unit, the sink and the shower door. Nothing was too hard with these jobs although we did have a couple of plumbing leaks to fix - one of which unfortunately put the bathroom out of action for our party. More on that to follow. We have a mirror in the bathroom which has a bluetooth speaker so Julia doesn’t have to put up with me singing in the shower!
This is the result of the Ikea hack...

And the finished bathroom...

With the bathroom operational, we turned our attention to plastering the upstairs. Pete, who we mentioned in the last blog, started working on it but he had come out of a long retirement just to help us and he wasn’t very well at the time so we all agreed that it would be better if we could find another person to finish the work. After a long hunt we came across Ricky who agreed to come to the island to help us. He plastered and we helped, fetching water, taping joints, cleaning buckets, mixing and making sure he had a safe platform to work from above the stairs! It made me realise how much more help we could have been for poor Pete.

Ricky's wife Shona joined him for a wee island holiday and she made us some lovely bobble hats. A kind and generous surprise...

Ricky did a great job and enjoyed his time on the island so we agreed to have him back to plaster the downstairs when we were ready. This would be no time soon though as we hadn't even started plasterboarding it yet. On reflection, I wish we had paid more attention to how he worked because, as it turned out, we would need to learn!!
The next task on the list was to hang the upstairs doors and install the radiators. Hanging doors is not too hard as long as you do a good job on the door frame. I'm please to say that Matt’s advice was followed and the frames we built were indeed fit for purpose. Drilling a huge hole in the brand new door for the handle mechanism, with only a few millimeters left on each side, was unnerving...

As we bought “unfinished” doors, Julia spent a long time oiling them.

And then the skirting board and architraves were to be installed. This was pretty straightforward however we had to buy a bulk load of both to get a good price. We probably have enough for 2 houses so I’m hoping we can sell the over stock at some point.
Meanwhile the master painter was at work finishing the walls upstairs…

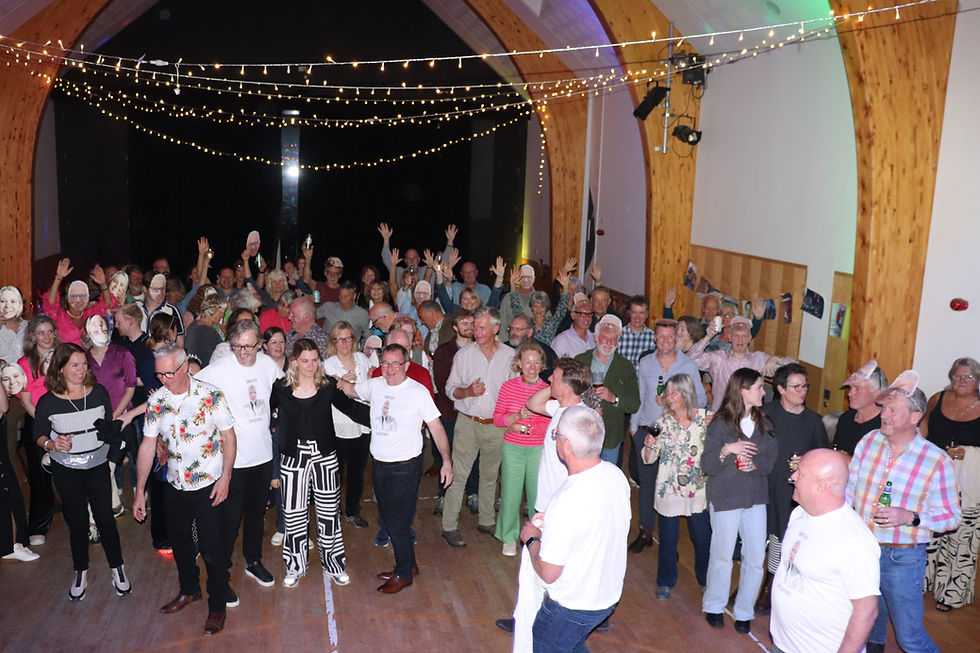
At about this time there was a significant distraction for us. There was a double birthday party for Tillie and I to prepare for and there was a lot of work to be done. We had about 60 people coming from the mainland and a significant number of islanders as well. The plan was for a Friday night barbecue on the beach for all the off-islanders and a Ceilidh/Disco party in the village hall on the Saturday for all. The weather did not play ball though so we ended up having to use the house for the Friday night BBQ. We erected a marque on the patio to cook the sausages out of the rain. As the house was full of building supplies, a swift reorganisation was needed and the empty shell of the main room had to be prepped for a party. The wind was reaching 50 mph and I spent most of the Friday night working in the lashing rain. John and Nick jumped in and did a big shift on the BBQs while I was distracted trying to keep the marque up. That involved drilling emergency bolts into bedrock to tie it down and mending connecting rods. Quite a few folk helped but I was surprised by Lucy's pal Jonny who dived in and demonstrated instinctive "island resilience"! I can’t thank Nick, John and Jonny enough for their help. Somehow the evening was saved and my brother-in-law Chris helped me take the marque down in the morning just before the next (and bigger blow!) hit us.
The unplanned house party...

And the main event at An Cridhe...

And granddaughter Maxie with the next generation of the Campbell clan. Just Ciara and Keith though as poor Katie had to work...

Julia, with the help of some very good pals (Ella and Janine in the photo below), did a fantastic job including all the catering for 150 people. It was a really fun party weekend and greatly appreciated by both Tillie and I.

After the dust settled from the party, the nights started drawing in so we decided to test the stove in readiness for winter. It worked perfectly and heated the water in the thermal store quicker than expected. We also discovered that the thermal store only needed to be at about 40 degrees in order to have a hot shower so the whole system was working very well. We now know that in winter, even if we have power shortage, we can use the stove to heat the house and provide hot water. It is great when one of the hair-brained theories actually plays out in practice!

The power supply plan had been on my mind a lot. We needed to do something about lack of solar in winter. Nothing however was simple and some mistakes had already been made. The choices were…
Replace the existing inverters with different ones so more solar could be added and a small generator could be used to charge batteries in the few times of need in winter.
Install and integrate a small wind turbine (the original plan).
… wait for it… Get a grid connection as a back up. EEEEK! What a climb down!!!!
Small turbines are problematic and although we do fully intend to build one eventually, it would be a very big distraction while trying to finish the house. Replacing the inverters would be costly and may introduce other integration challenges. The grid option is VERY expensive to install but there are 2 major benefits. Firstly there is a full backup at the flip of a switch and secondly, Julia would have a much simpler life if I were to “fall off the perch”!
So, we have recently ordered a grid connection and will be trying to get that installed in the coming months. It will however just be a backup as we will continue to run the house off-grid.
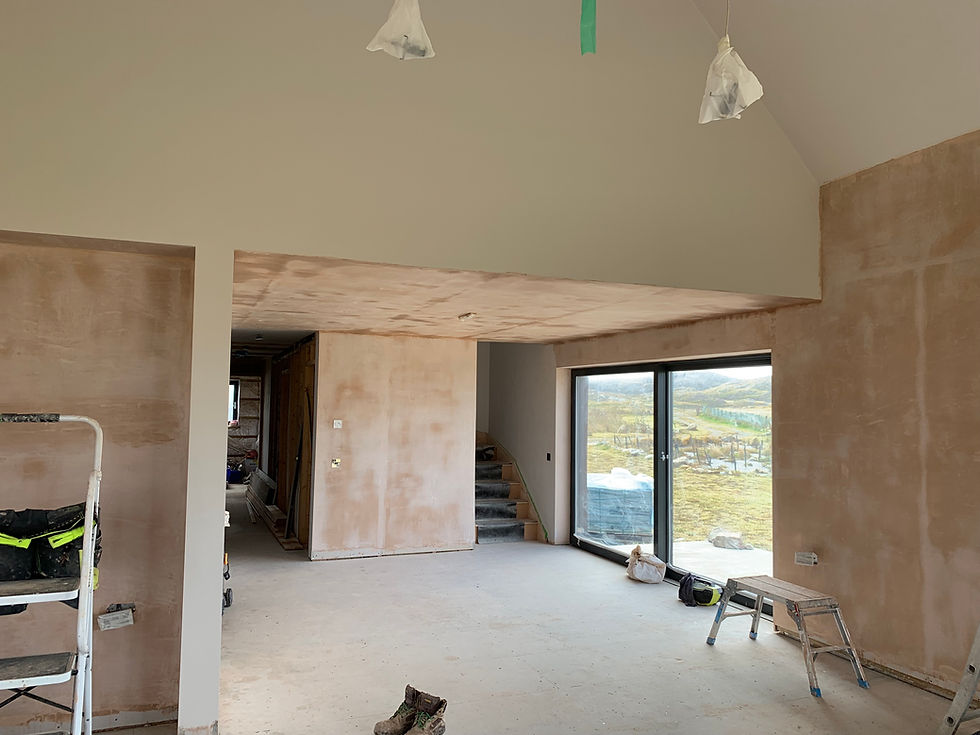
Once the upstairs was done (apart from carpets and cupboard doors), we turned our attention to the downstairs. The one remaining structural job was to build the end walls on the kitchen. There had been an ongoing debate over whether or not to have pocket doors to allow us to shut the kitchen off from the sitting room but in the end we decided to build out the walls to align with the kitchen cabinets. No doors to be installed!
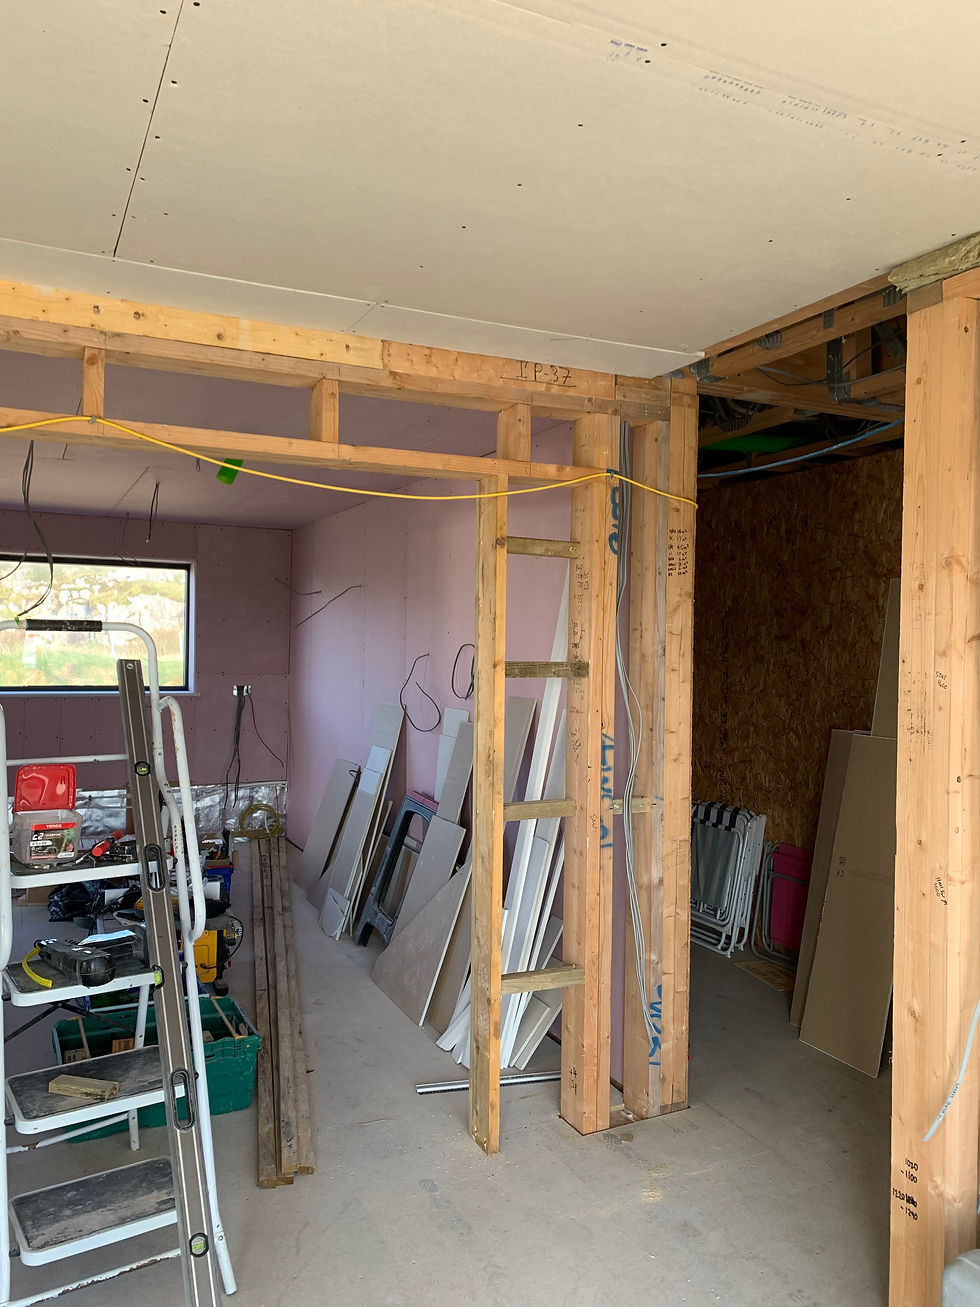
And then it was back to plaster boarding. Starting with the utility room and kitchen. We used fireproof plasterboard for the kitchen as it is the most likely place for a fire to start. It is pink and slightly heavier than the normal stuff. The green stuff is water resistant and can be used for bathrooms.
As we plasterboard the house the mountain of sound insulation is gradually disappearing into walls and ceilings...

When Ricky (the plasterer) was with us, he said that in order to plaster the main room, which is a double height room with all sorts of complicated angles, we would have to erect 2 tier scaffolding. This was a very complex puzzle. The scaffolding must allow movement around it at the base but also enable you to reach every part of the walls. We did buy some scaffolding but we would need to borrow more from Patrick as well. For those of you who have the faintest idea about scaffolding, it was a double height double bay centre with 2 single bays on each side fixed with out riggers to reach the end walls. We worried about the weight of it on our suspended timer floor but according to my calculations, this would be just about ok as long as only 2 or less average weighted people were working on it. What a relief it was to finally take it down!
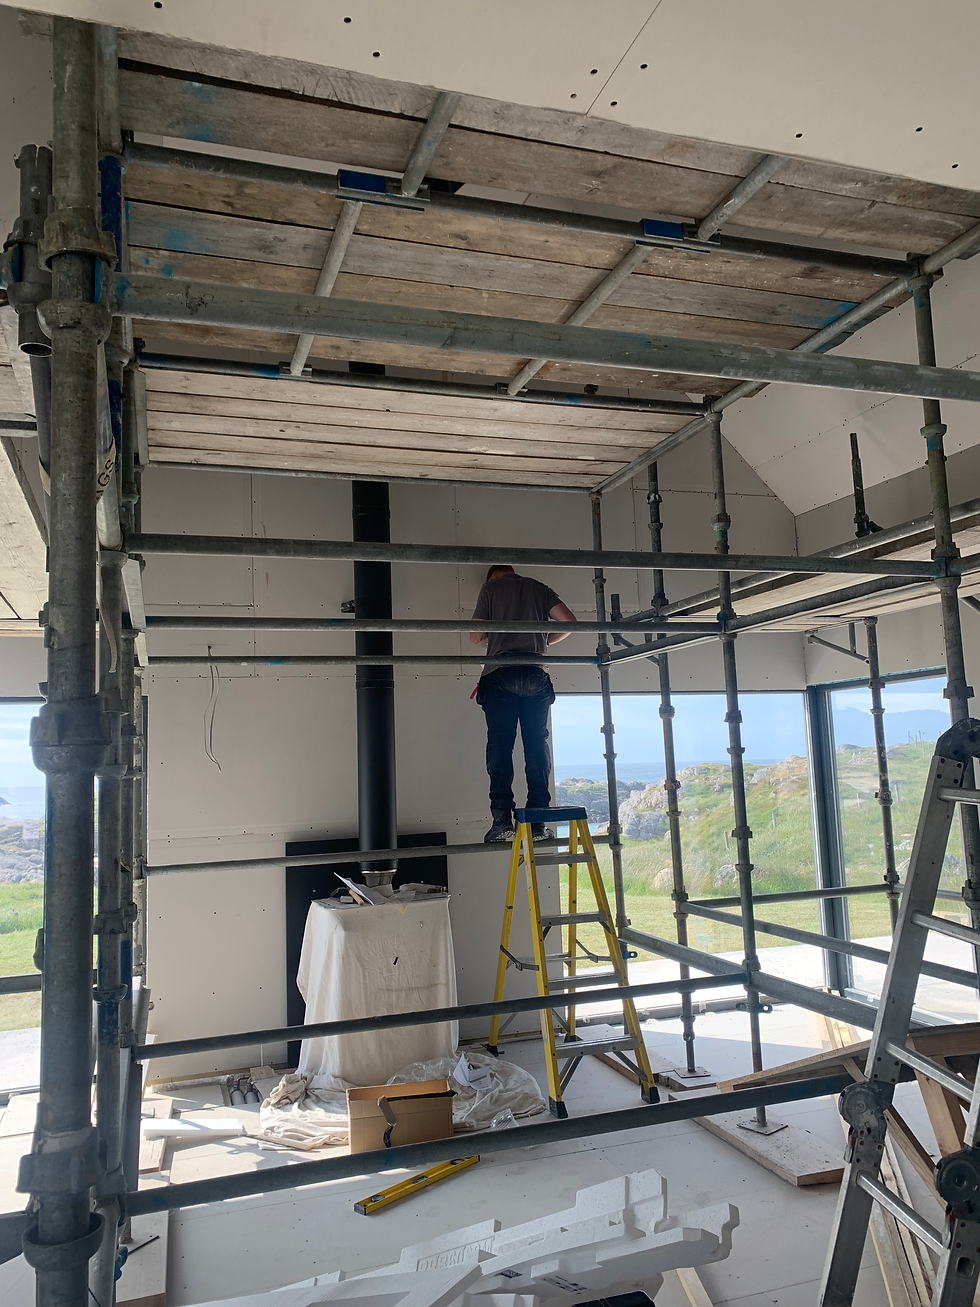
We then set about the plaster boarding from our various new platforms. It worked very well and made what would have been an impossible job quite achievable.
Up until this point, we were existing with temporary power in the house consisting of 2 sockets but the time had come to schedule a second visit with the electricians for what is called the “second fix”. Needless to say we were ill prepared and spent the weeks before rushing around getting all the plug sockets installed and light points plasterboarded. I also sourced all the equipment so there was a long inventory to check including all the various lights for the whole house, all plug sockets and fuse board (nowadays known as the consumer unit) and a number of other switches and connectors.

Ross and Connor arrived and worked hard for a 3 long days with me helping in any way I could and by the end, all the electrics were in and working. What was more pleasing was that the impedance tests all passed which meant that my DIY “power station” in the garage was not just supplying power but working safely and correctly. I might have been technically capable of installing the house electrics but it would have taken us an age to do, it would not have been done so well, and we would have needed a qualified person to approve it anyway. This was a big milestone in our project. Jonny, Ross and Connor were a pleasure to work with and I can’t sing their praises highly enough!
Ross with me in the photo below...

Once we had almost finished boarding the downstairs, we contacted Ricky again to see how he was placed to come back and plaster for us. Unfortunately he was very busy and after a few WhatsApp messages it became clear that he would not be able to come back any time soon if at all. So we were back to square one and the task of finding someone to take Ricky’s place was no easier than before. After a few dead ends, we decided we would have to at least start, or attempt to start it ourselves. As luck would have it, Sam, who is self building his Church renovation (and is a highly skilled builder), was also in the same position. He wanted to plaster his Church and was willing to learn how. Sam, having had a lesson himself, took a day out to help us. We spent the day plastering a ceiling (he did the vast majority of it!) and at the same time, he taught us what he had learnt. This, combined with further youtube viewings, and a purchase of some new tools, got us tentatively started.

At first our own results were not great but with each wall they gradually improved and soon we were producing an acceptable finish. Nothing like as good as Ricky’s walls but good enough! There are 3 things you need to get right to do this job. Preparation, Timing, and Cleanliness! Preparation means making sure everything is ready. There are no screws sticking out, all the joins are taped, any obstacles such as plug sockets are removed and/or covered with masking tape etc etc…. Once you start mixing the clock is ticking and you won’t have time to stop so Timing means getting the first coat on in 45 minutes as you need to start the second coat before the first coat is too dry. You then have to go back a third time to fix any holes. If you are back at the beginning too late, the plaster is rock hard and you can’t fix anything. Then there is a 4th pass and a dry trowel pass so a medium sized wall is roughly a 4 hour non stop shift. Cleanliness is about making sure there are no “bits” from an older mix in a new mix or on your tools. If you have old bits they scratch lines in the plaster as you’re working and get lodged into it. You need to keep cleaning your tools as you go and the second mix has to be done in an absolutely clean bucket. It is physically quite demanding too and you need a strong arm for a big area. You can have joins in a wall but it is best to avoid that as they can be noticed and can take a lot of sanding. Boring I know but one day, one of you is going to give this a go and these words will, I can assure you, be very helpful!
The kitchen design has been evolving since the foundations were being dug and now it had to be finalised. We agreed the layout (well, I simply agreed with Julia’s plan) and we started shopping at all the “usual suspects” including Howdens, Magnet, Ikea, Wren etc. etc. We discovered another option though called “DIY Kitchens” who are an online only company. The cost and quality seemed very good as they don’t have expensive showrooms so in theory you get more bang for buck. We sought out some reviews from customers and installers. It seemed like a good option. We spent hours on their rather clunky online design tool building our kitchen and utility room and finally ordered both. The delivery charge to Coll was confirmed as a fixed cost of £120 and we paid the full order value with a credit card. A couple of days later however I received an email from them saying that they would not deliver to Coll and an error in their ordering system had allowed our order to be placed. After several attempts to resolve this, including setting an Oban delivery address, they refused to help and simply cancelled our order. The money was credited back and that was that. I even wrote to the MD to try to get a senior intervention but received a message saying “Our Managing Director is not customer facing”. FFS! What a waste of our time that was! I might still raise a small claims court action to receive compensation for the days of wasted time and the reworking needed for the kitchen wall supports.
One of Julia's kitchen etchings…

In the end, we went for a Howdens kitchen (I have a trade account with them) and all was well. It was more expensive than DIY Kitchens and I doubt any better in quality but at least the Oban store was able to offer us some direct support and the lead times were impressively short.
What I struggle to understand is why kitchen units and doors are so expensive. Even the so called "up market" ones are really the cheapest of cheap timber (MDF or chipboard) with a sort of plastisol veneer. The hinges and drawer rails are pretty standard and when bought independently, are very cheap! There really must be an unexploited market for bringing low cost, high quality kitchens to customers. Anyway, we sucked it up and bought the utility and kitchen units. We then ordered 7 appliances from a company called Appliances Direct, again with a small trade account discount. There were of course the predicable delivery issues to Coll and at one point we were led to believe that our appliances were sitting outside in the lashing rain a yard in Oban. Thankfully this was fake news and before long we were smothering in carcasses and large boxes with little room to move.

The actual installation of the units is straight forward however with Howdens there is more work required by the installer than other options. We bought ready built units with upgraded drawers. The upgrade drawers had to be built out (although the the standard ones come installed) which was disappointing and not what we had been told. It wasn’t just the building of the drawers but also the installing of the rails which required drilling holes in the units using measurements and spirit levels. As Howdens are only a trade supplier, the end customer pays for this extra work with increased install costs. There are adjustments to line up the unit drawers and doors with each other but that is a faff! You start at one end of a row and when you get to the other end you can discover that there is insufficient adjustment left to match your line. You then have to go back and do it all over again. I’m pretty sure this is a kitchen-wide issue and not specific to Howdens but if you are installing the drawer rails they need to be in exactly the right place.
We also decided to have compact laminate worktops. The original plan was to have a product called Dekton but the compact laminate seemed very hard wearing and we could actually cut and fit it ourselves. It does however eat a lot of expensive saw blades! Now we have installed it we are even bigger fans. It’s warmer to the touch than stone or pseudo-stone tops and can be easily repaired or replaced if damaged.
So with all the gear and no idea we set about installing the units and appliances into the kitchen and utility room.

We made a few mistakes along the way but nothing that would be too difficult to fix. The main one was aligning the units to be flush with the opening to the sitting room.This meant that they were a few millimeters away from the wall at the end as when we built out the wall we expected slightly wider units. The consequence was that the end panel adjoining the high cabinets with the low ones (known as a "Decor End") was not wide enough to reach the wall so we had to buy another wider one. £180 for a sheet of the stuff! What a rip off!
The work tops have been a challenging job although we have now finished the utility room and have done all the cutting needed for the kitchen worktop. The only remaining thing to do in the kitchen is to glue them together and glue them down. The hob and sink are ready to go in thereafter. We have tested the gas connection but may need a specialised LPG gas plumber to certify that at some point. Making the worktop join is very difficult as the cuts need to be perfect for a seamless join. A saw won’t achieve this and you need to use a router to take off the last 1mm for a good finish. We had several failed attempts at this but luckily we had a lot of extra worktop to play with.

To join them you cut grooves into them and insert things called biscuits! Its the same principle as dowels however they are flat and oval in shape. There is a special machine needed to cut these grooves out and thankfully Matt was able to lend us his one in return for a new blade! The grooves have to match exactly on each side and its a nerve racking process. One slip could easily write off a worktop! And when you glue them, the special glue is very fast acting so timing is extremely important. We did a few dry runs to make sure it would work ok. We also invested in some clamps from ebay which suck onto the top and them pull them together.

On one of our mainland trips we went to Ikea to see if we could put together another “hack” for our walk in wardrobe. It wasn’t going to be very classy but as there is a cupboard door to be installed it didn’t really need to be! The result was functional if a little clunky…

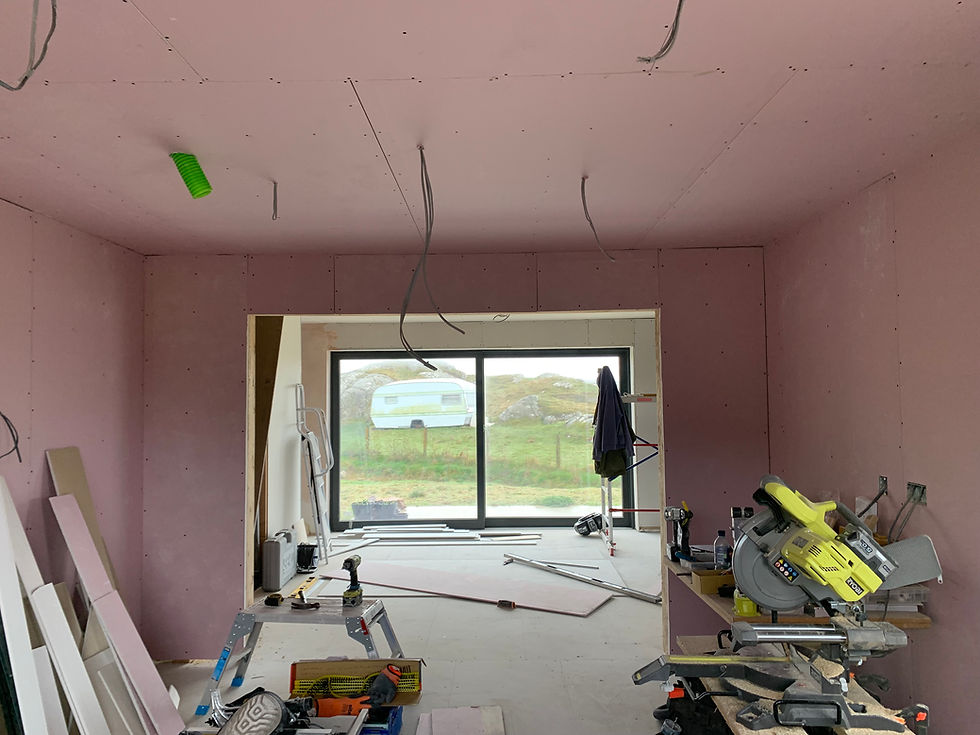
And the master painter started working downstairs after the plastering was finished…

And a few shots of the current state of play...
The utility room units...

And the kitchen (the units still have the protective film on so they look shiny but they are actually matt)...

So we are getting quite close to bringing you up to date now. The only other indoor job we have started that is worth a mention is the flooring. We elected to use LVT for the whole downstairs and have been sitting on a stock pile of it for over a year now. It is the same sort of stuff as Amtico (which some of you will have heard of) although a less well known brand that we were able to get it through one of our trade accounts. We opted for tiles that are “click together” with their own backing foam. They are a bit like stone tiles but softer on the foot and only 5mm thick so good for use with the underfloor heating. The “click together” system means that we can take them up if we ever needed to get underneath for any reason. It isn’t that simple though as you need to take them off in the reverse order you put them on so getting under the floor somewhere might mean lifting a lot of tiles! I’m hoping we don’t ever have to do that. We started laying them just before we left for France in August and the system works brilliantly. They are easy to cut and easy to lay….
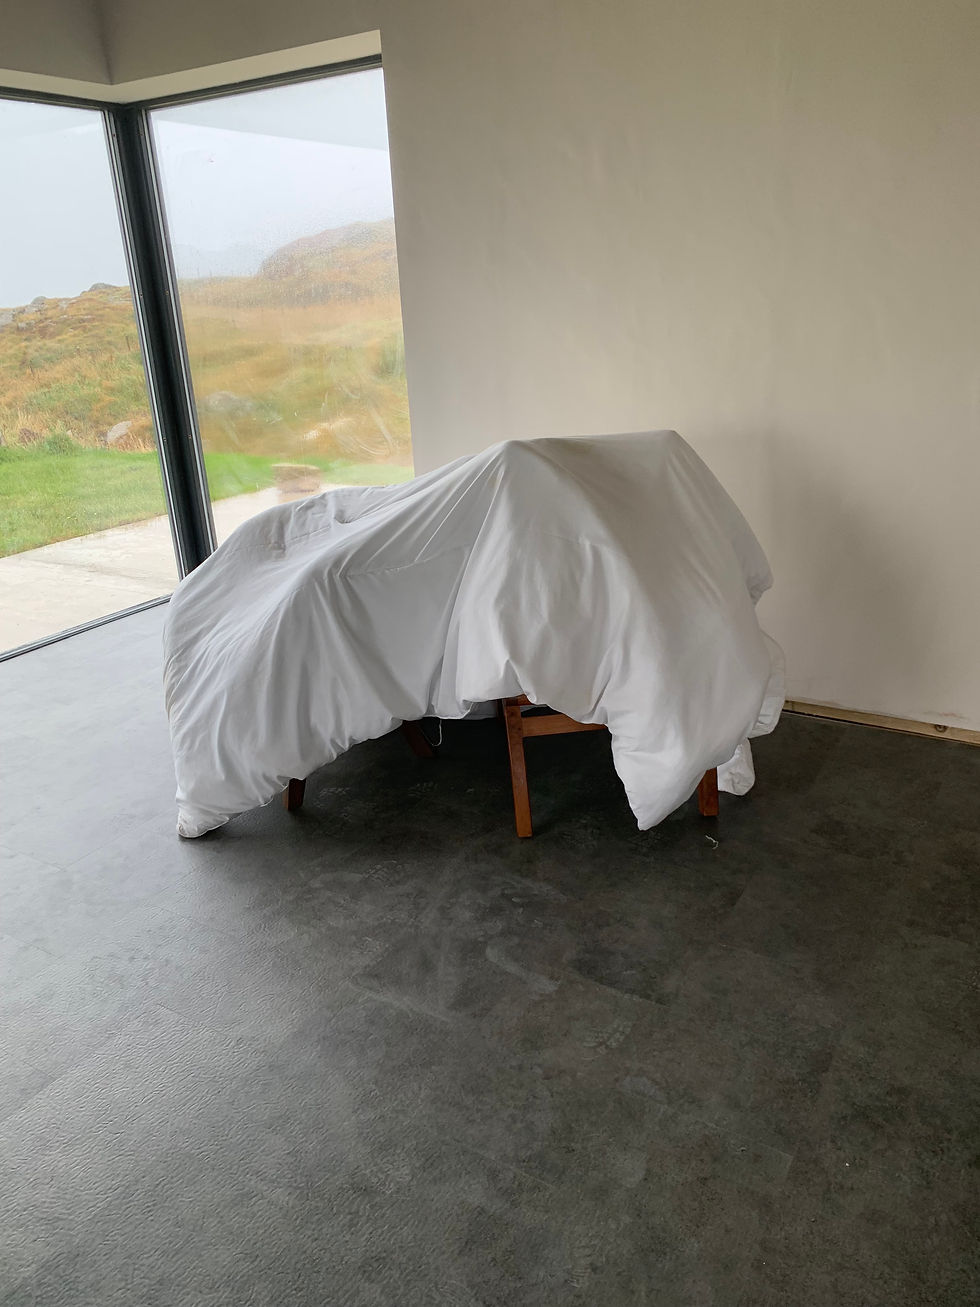
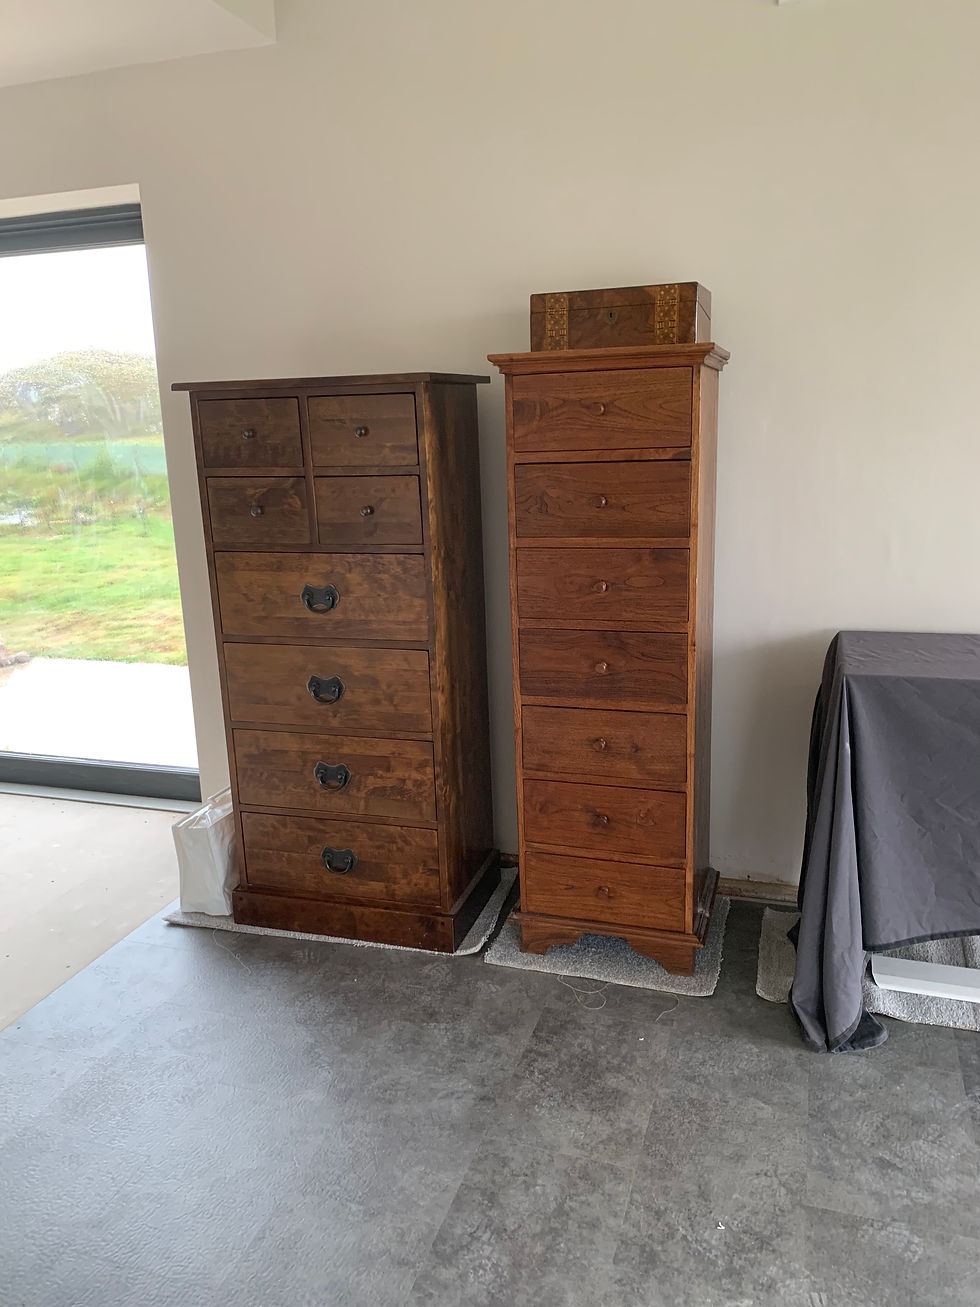
We also have most of our old furniture here now - we haven’t seen that for a very long time!
And of course we have installed “Red Rocks Cinema” just in time for the British and Irish Lions tour…

Apart from all the above, we have done a few outside jobs as well but not as many as we had hoped. In the summer we installed concrete runners on our track to stop the pot hole mining the 2 wheel drive cars do as their wheels spin on the steep section. The edges have cracked a bit but the centre of them has rebar so should withstand traffic for some time. They aren’t very pretty but definitely work!

We have also increased the size of our pond by damning it. I’ve installed a pipe that can be raised and lowered to change the water level. We will lower it in the winter and raise it in the spring. That will maximise the level in summer and reduce the water table in the winter thus making the ground drier under foot. I’ve put more trout in so lets see how they get on in the bigger pond which, in places is nearly 4m deep!

Hopefully we will find out at some point…

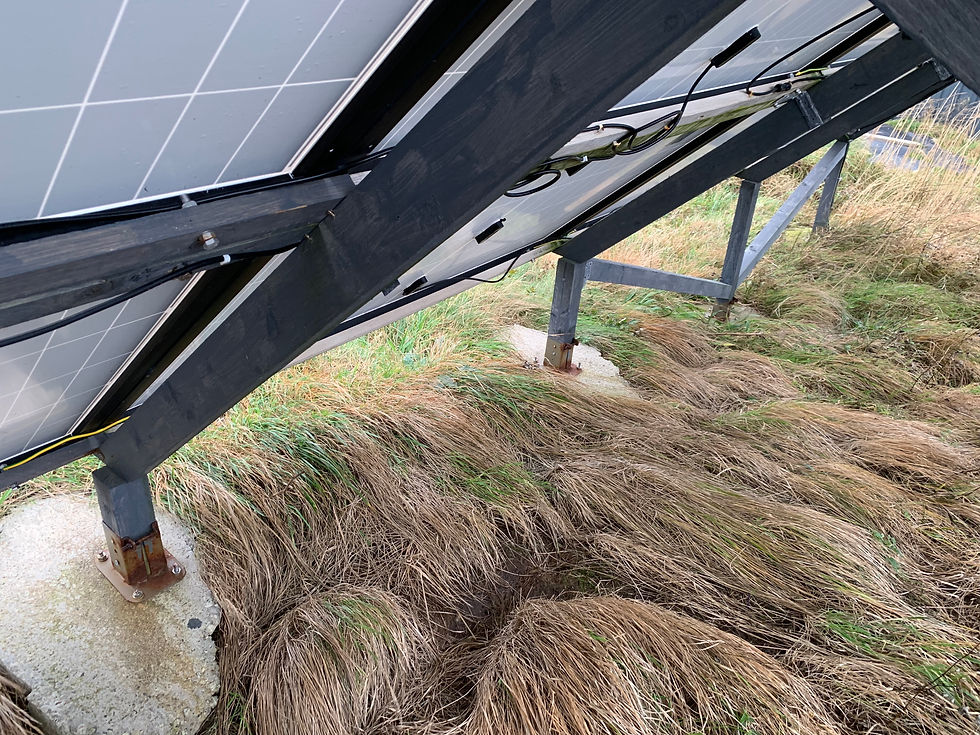
The only other outdoor fix was the painting of the solar array footings which were rusting terribly and the installation of lock nuts to prevent any further destruction from loose panels in the winter gales. This photo was taken before the paint job!
Next summer we hope to lay the patio tiles and re-stain the house cladding. The patio tiles have been sitting on pallets outside our house for too long and the cladding is fading prematurely due to the sand blasting it gets during storms.

So that’s the boring bit out of the way and you’re all up to date. There is still loads to do but life on the island is good and we are happy to continue chiseling away at it. We are in good spirits and keen as ever to keep going. Some say we will be working on it in our dotage which may be true but if we are happily doing so then that's ok by us!
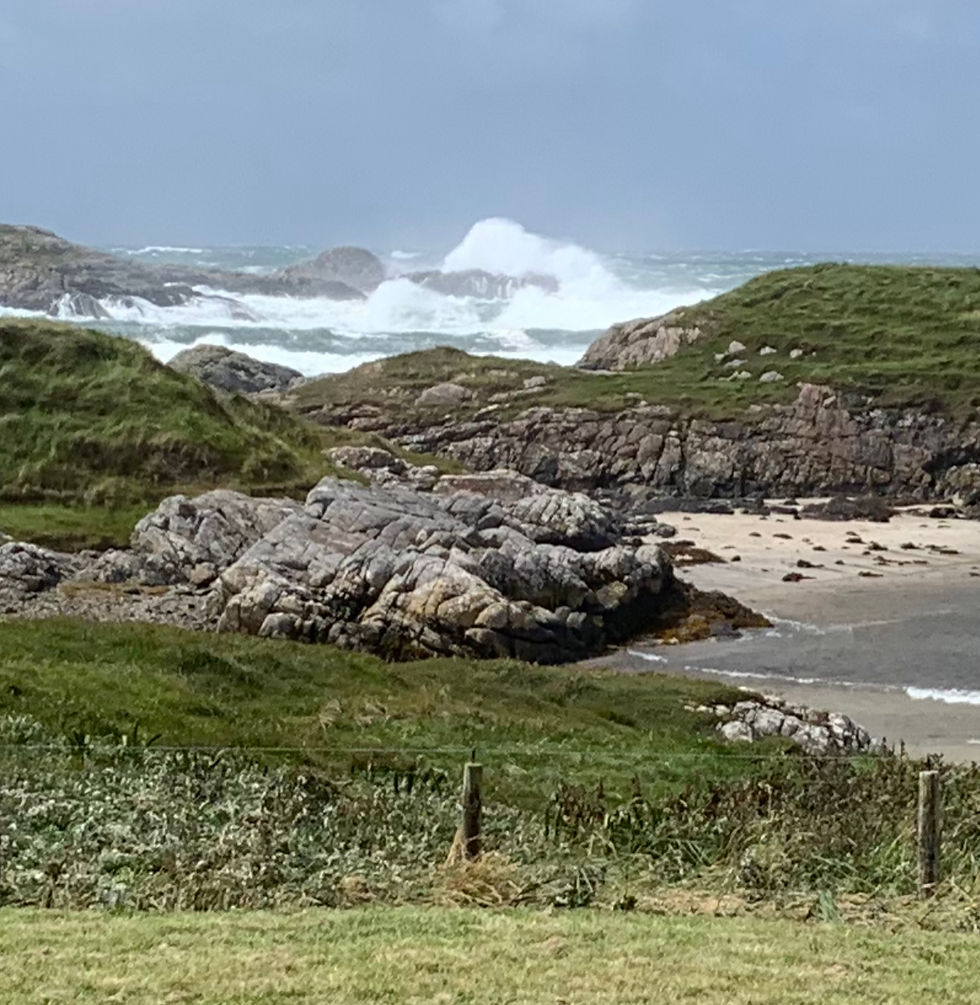
It’s been over a year so there is inevitably a lot of “non building” news too. We’ve had a few more storms since the last post. The most recent, a rare summer blow called Floris, removed almost all the flowers on the plot (an aptly named storm indeed!) but thankfully only minor damage was done. 90mph was a the highest recorded gust on Coll. You can see from the forecast how badly placed we were for this one...

We have an emergency supply of coal on a pallet outside the caravan. Weirdly, the wind blew the top off the coal sacks but left the coal in situ…

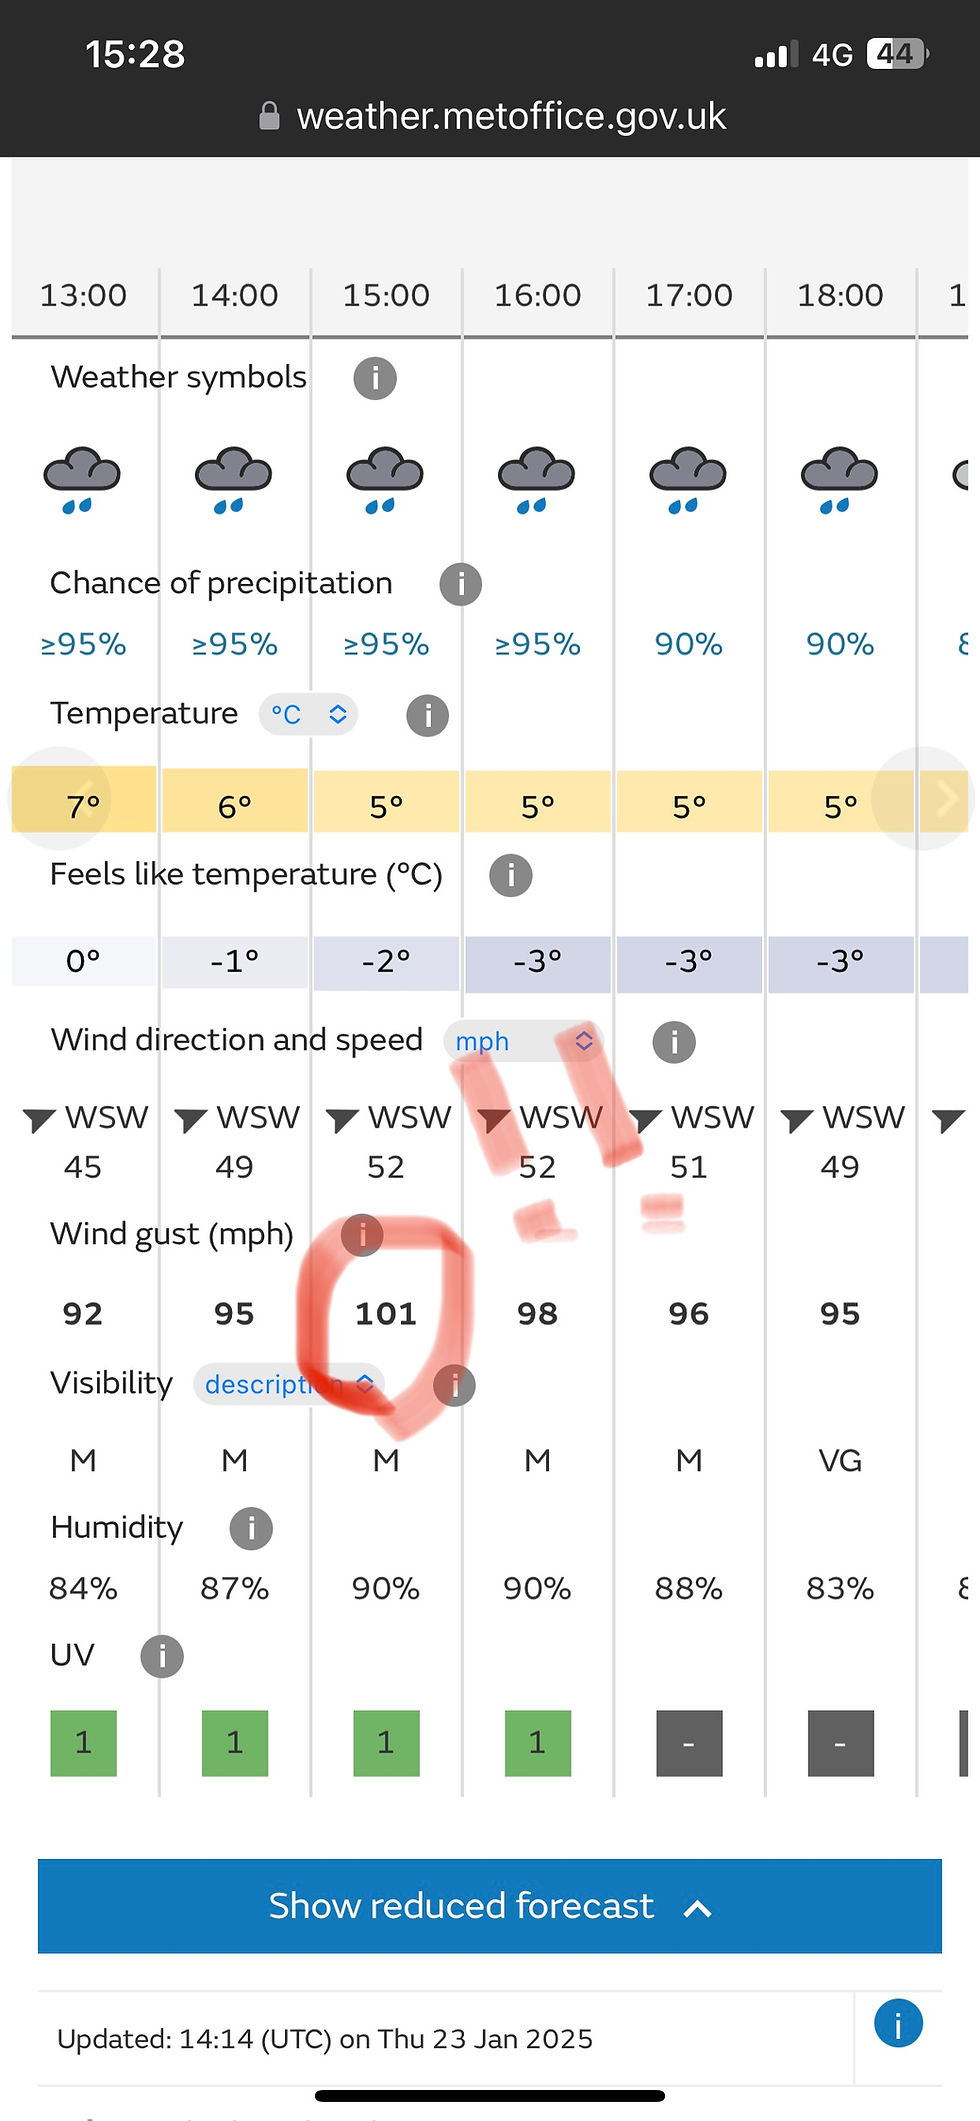
One forecast last winter predicted 101mph here .. thankfully it was only about 85 mph in practice...
The other thing I have started to watch is the lightning strikes. Coll does get hit by lightening more than most places and we are vulnerable to this - particularly with our off grid kit. One direct hit could do a lot of damage and I do intend to improve our electronic defences in the future. Thankfully we haven’t been hit but this map shows that it does happen. The photo below shows a snapshot from my app. The red dots are within the last 15 mins, the yellow ones are in the last half hour and the grey ones older that that. You can see a couple within half a mile of us as the storm passed over Coll.

And Julia had to endure a 4th caravan birthday but almost certainly her last one …

And, as I really know how to treat a girl, she was rewarded with a new pair of badly needed work boots (not the only present honest!!!) …

Despite only having a gas stove in the caravan and limited gardening facilities, Julia managed to scoop a few prizes at the Coll show this year. She won the coveted sausage roll competition with what was undoubtedly the best sausage roll I’d ever tasted and she also won the best pancake and scones. I thought about entering the “men only” cherry cake but after my last attempt, which produce a cake which was the exact height of a cherry, I considered it futile!

She grew this in our bedroom as well but it didn’t make the cut...

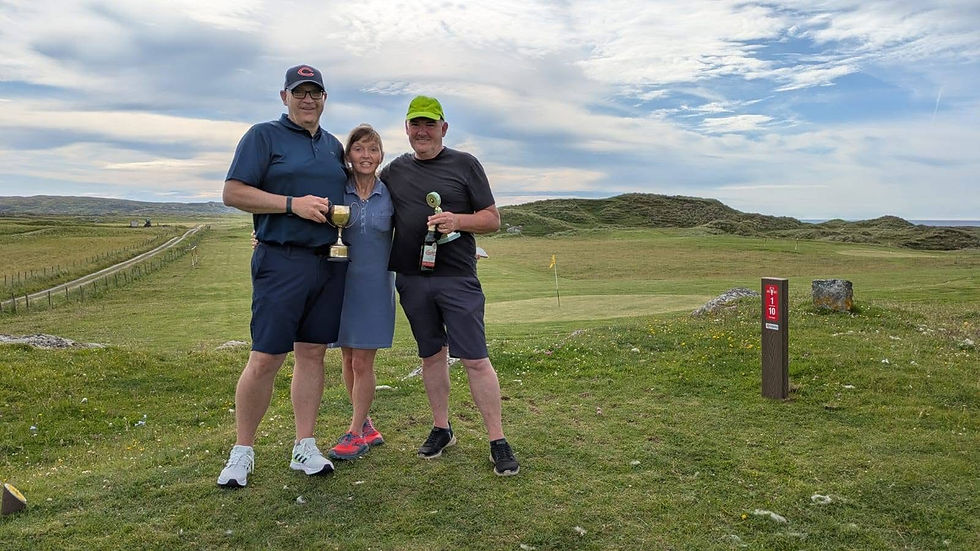
Julia was also crowned Coll Golf Club Ladies champion for the second year in a row. She was so confident, she didn't even bring the cup back from last year! (Actually it was delayed at the engravers so just as well she won it again)
And in 2024, I won the biggest fish in the East End fishing competition. Nothing to do with the fact that Julia is the Fishing Competition secretary honest! This is her in her official capacity...

We’ve also been looking after these two beauties for a friend on the island. With the roads on Coll you’d be lucky to make third gear but I never found out as Ruaridh thought better than to leave me with the keys!

On what must have been the hottest day of the summer, a large gathering of Collachs went to Tiree for a day trip to the Tiree Music festival. We took the morning ferry and returned on the evening one. A great if a little boozy afternoon was had. This coincided with Neil's visit so he came along too. It was a wrench leaving for the ferry just as the party was kicking off so next year we will stay over and make a night of it.


One curious sight you might come across if visiting Coll on a calm summer’s day is Kevin’s car! Kevin (who owns the Coll Hotel) has built an amphibious car which he uses as a tender to get to and from his boat. It’s fun to watch people do a “double take” when they see the yellow car in the bay. It isn’t the fastest and certainly not A rated for seaworthiness but a lot of fun...

Besides island life we have been on a few trips in the past year including a day at Wimbledon, a family wedding and a holiday in Spain with Julia’s brother and his extended family...

We also visited the actual caves of Nerja. This is where we were first inspired to start plastering...

We have had some excellent fishing over the past year. Both sea trout in the burn estuaries and sea fish. One particular day, Nick and I fished from his boat for just over an hour and caught so many pollock we had to stop fishing early. We don’t take them home whole any more. It is easier to fillet them by the shore and return with freezer bags of fillets.

We always acknowledge visitors in our blogs in recognition that most people visiting Coll from the mainland could probably get from their home to Sydney quicker (unless they travel on a Tuesday in summer)! There were loads of visitors for the party however so it is too big a list to go through but a special thanks from Tillie and I to every one who made it.
My namesake Keith, who I haven’t seen for ages, stayed on for a few days to explore the island. He didn't want to go on that beach though...

Our most prolific visitor, who actually lives in Geneva, has visited us twice since the last blog. Once for the party and once for the hell of it. He spent a few days “working from home” in the caravan!

We also had sister Gill and brother in law Chris with grandkids for a few days. Marc and Shaun certainly enjoyed the island life - climbing on anything vertical, sledging in the dunes and learning new card tricks from Julia!
This was them on the nose of the Big Viking...

Daughter Lucy will have reached this point and be thinking that Grandpa has forgotten to mention something! Well, the best is saved until last... Our second grandchild Coralie was born in May …

So thats a wrap! I’m not going to predict the next post but it should not be as long coming as the last one.
In the mean time, we hope you are all keeping well and enjoying life!
K&J xx


It all looks fab!! The bathroom and hot showers must be especially welcome?? Even after reading this it is still hard to imagine all the work and decisions that went into it all. Well done!